前言
现在,在程序开发中前后端分离的模式已经成了主流,而在前后端分离的项目中,如果后端的开发人员能提供一份清晰明了的接口文档,那么对接的前端开发人员也会轻松很多,大大的提高了前后端沟通效率和开发速度
Swagger可以用来定义和记录RESTful Web服务的接口文档,可以通过使用给接口代码添加申明式注释的方式、也可以使用yml文档格式来生成swagger渲染的前端接口文档界面
下面来介绍第二种:使用yml文档格式的方式来生成swagger渲染接口文档,用的是OpenAPI 3的标准
yml文档规则
| openapi: 3.0.0
info:
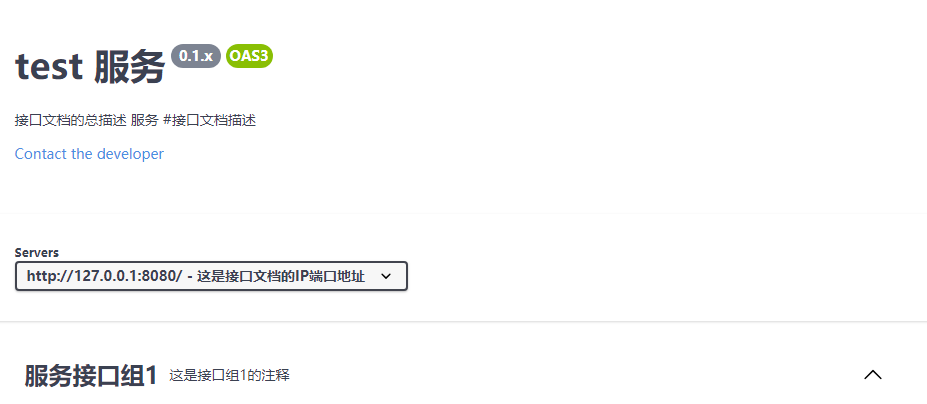
description: 接口文档的总描述#接口文档描述
version: "1.1.0"
title: test 服务
contact:
email: xxx@xxx.com
servers:
- description: 这是接口文档的IP端口地址
url: http://127.0.0.1:8080/
tags:
- name: 服务接口组1
description: 这是接口组1的注释
- name: 用户
description: 这是接口用户组的注释
|
1
2
3
4
5
6
7
8
9
10
11
12
13
14
15
16
17
18
19
20
21
22
23
24
25
26
27
28
29
30
31
32
33
34
35
36
37
38
| paths:
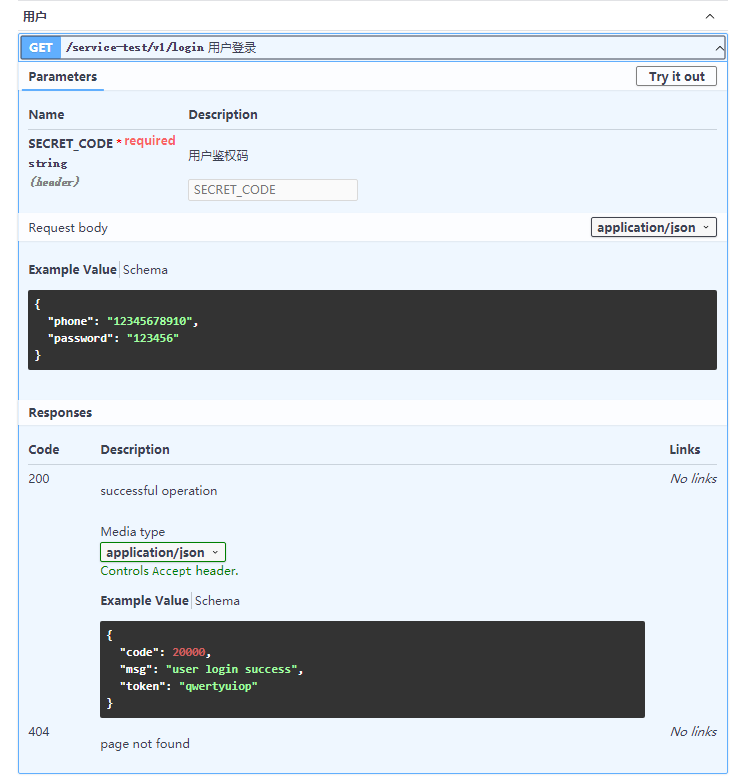
/service-test/v1/login:
post:
tags:
- 用户
summary: 用户登录
parameters:
- name: SECRET_CODE
in: header
description: 用户鉴权码
required: true
schema:
type: string
requestBody:
content:
application/json:
schema:
type: object
example:
{
"phone":"12345678910",
"password":"123456"
}
responses:
'200':
description: successful operation
content:
application/json:
schema:
type: object
example:
{
"code":20000,
"msg":"user login success",
"token":"qwertyuiop"
}
'404':
description: page not found
|
另一种参数方式
1
2
3
4
5
6
7
8
9
10
11
12
13
14
15
16
17
18
19
20
21
22
23
24
25
26
27
28
29
30
31
32
33
34
35
36
| paths:
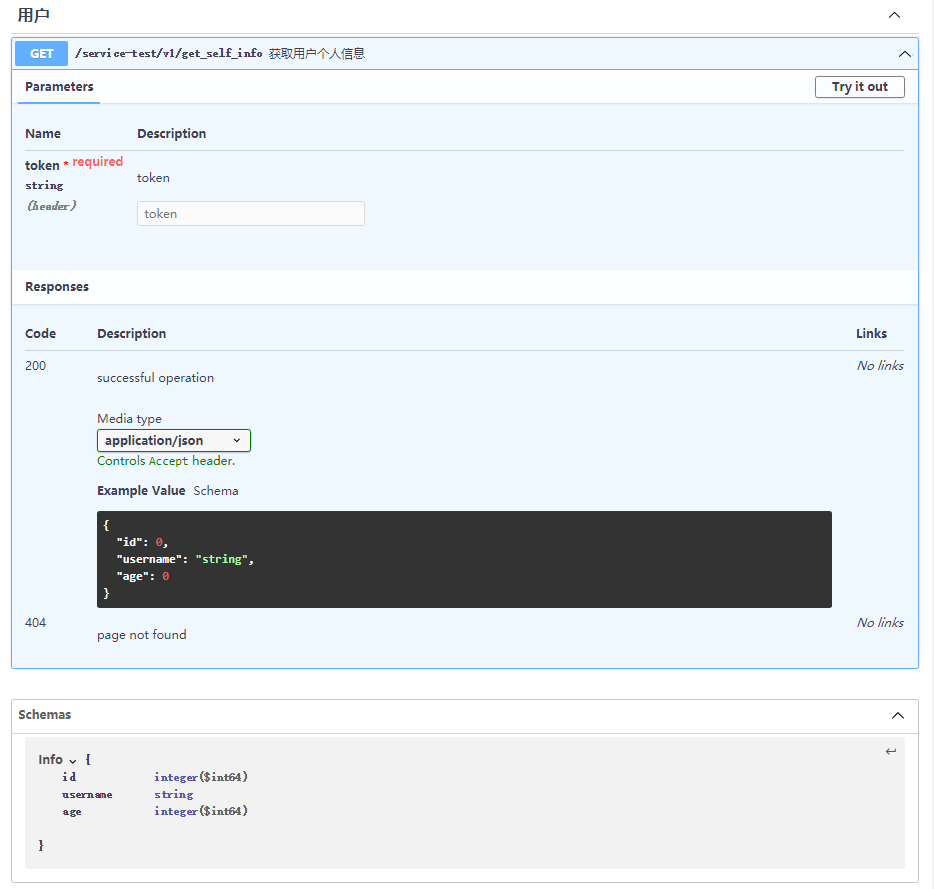
/service-test/v1/get_self_info:
get:
tags:
- 用户
summary: 获取用户个人信息
parameters:
- name: token
in: header
description: token
required: true
schema:
type: string
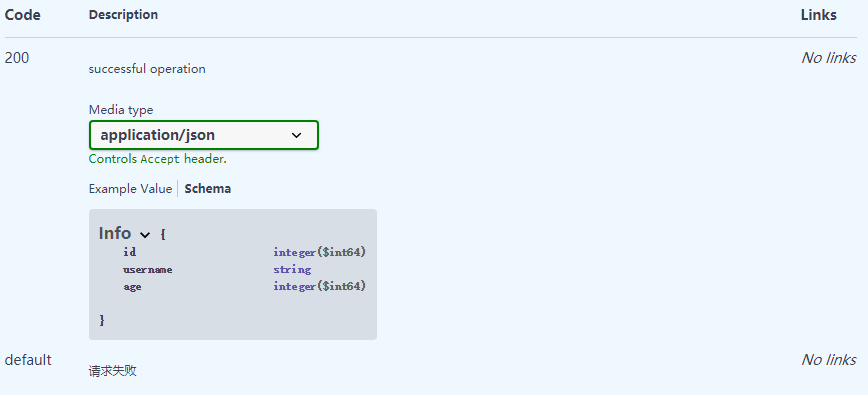
responses:
'200':
description: successful operation
content:
application/json:
schema:
$ref: '#/components/schemas/Info'
'default':
description: 请求失败
components:
schemas:
Info:
type: object
properties:
id:
type: integer
format: int64
username:
type: string
age:
type: integer
format: int64
|
开启Swagger
安装本地Swagger editor
在 https://swagger.io/ 官网上下载安装Swagger editor,解压后从cmd进入该文件解压路径,执行:
1
2
| npm insatll -g
npm satrt
|
执行完后才cmd窗口上就会显示Swagger渲染前端页面的url,在浏览器中输入就可以进入本地Swagger editor
在线使用Swagger editor
内容和本地是一样的,有网络的情况下可以使用 http://editor.swagger.io/ 体验在线版
总结
通过上诉swagger的yml可以给前端一个简单明了的api接口文档,能大幅度提升项目整体开发进度
本文只是使用了yml文档来构建swagger前端渲染文档,除此之外,还可以以通过使用给接口代码添加申明式注释的方式,将放在下次的文章内容中